Saturday, October 24, 2015

Creative anchor and chain installation

Oceanus with her new Lofrans Tigress windlass, Rocna 25 (kg) anchor and chain. Goodlander would take issue with me using the cleat on top of the windlass (too much wracking) to take the strain off the chain, but I wanted to try it out. When not at the dock, I'll using the mooring cleat.
For more than a year I struggled with exactly how I would install my anchor and chain aboard Oceanus, my 45-year-old Columbia 43. The boat had an old manual windlass, a 45-pound CQR anchor and a chain and rope rode. It was all questionable. We wanted to cruise far and sleep well at anchor, so I knew I needed to upgrade everything.

Piece by piece I chose the elements of the anchoring system: a Lofrans Tigress windlass, a Rocna 25 (55-pound) anchor, 300 feet of 5/16th G4 high-test chain connected with a load-rated hot-dip galvanized shackle. These choices were heavily influenced by the anchoring advice from the folks at Morgan's Cloud, Attainable Adventure Cruising web site. Their on-line anchoring book very convincing lays out what anchors to buy (Spade or Rocna) and how to choose chain. They also go in to great detail about shackles: what to buy (a load-rated galvie shackle) and what to never buy (stainless steel swivels). Their experience with decades of high-latitude cruising and anchoring under challenging conditions together with their no BS approach made them my go-to source for anchoring equipment advice.
The choice of the Lofrans Tigress windlass and the Rocna was relative easy, figuring out the other elements of the anchoring system and how to put it all together took some time.
I went back and forth on how much chain I needed -- 200 feet spliced to a nylon rode or 300 feet of all chain. I wanted 300 feet, but I was concerned about that much weight in the bow. Then this summer we got a visit from our friends, Karin and Joe aboard Flying Sideways, another Columbia 43. For the last three years they cruised their boat from San Diego to Mexico and the Pacific Side of Central America. They said the boat would handle the weight of 300-feet of chain fine. They also said I would need that much.

So when I bought a copy of Creative Anchoring, the new book from Capt'n Fatty Goodlander, I was delighted to learn that the anchor, windless, amount of chain, everything, right down to the shackle, that Capt'n Fatty had aboard his 43-foot, 30,000-pound ketch Ganish, was exactly what I bought for Oceanus. The only difference was that he had 3/8ths G4 chain, whereas I had 5/16ths G4. But his boat is bigger by 8,000 pounds and is ketch-rigged, so it is heavier and has more windage than my boat.

The book, like all of Capt'n Fatty's writing, is funny and entertaining. Better yet, he explains in detail how he rigged and marked his chain and a step-by-step explanation about how he and his wife, Carolyn, deploy and retrieve the anchor. Just what I was looking for.

Virginia and I started putting together our anchoring system. I drilled holes in the deck where our manual windlass was. After removing as much of the balsa wood core as I could reach with a bent nail in a hand drill, I taped up the bottom of the holes and filled them with epoxy thickened with cabosil to about the consistency of honey. This protects the balsa wood core even if the fitting leaks.

The next day I redrilled the holes and ran the bolts through. Virginia, chief electrician aboard Oceanus, mapped out where to run the wire for our windlass. Then we worked backwards with a hole saw along the path the wire would take back to the battery bank in the saloon. It ran under shelves and through lockers in the forepeak, our stateroom and the head until we reached the bathtub.

Old technology saves the day.
The tub has a seat. Under the seat is filled with foam insulation. I needed to drill through the insulation to the plywood bulkhead and into the battery box underneath the forward settee in the saloon. I was nervous about doing this because I could inadvertently drill a hole in our tub. Virginia would hurt me bad if I did that. So, I used a long bit on an extension in my old Stanley brace and went from the head side where I knew where the sides of the tub were. It worked like a charm and was kinda fun too.

With the pathway to the battery box established, we used a flexible 100-foot tape to measure precisely how much wire we would need. We even used masking tape to hold the measuring tape in place to get a good measurement. The two runs of double ought tinned wire is expensive and we didn't want to buy more than we were going to use.

Don't cheap out on the wire. Undersized wire causes voltage drops that hurts the performance of your windlass and can cause heat buildup in the windlass and the wire. The wire can get hot enough to cause a fire aboard. Goodlander has some scary stories about this in his book.  The cable we used is as big around as your thumb.
The windlass cables start their journey from the battery box to the chain locker. Note the 100-amp breaker in the positive (red) cable.
We ran the wire and put a 100 amp breaker in the positive (red) wire inside the battery box. This is important to protect the big wire. It's also a handy way to cut the power to the windlass so no one can run the windlass from the deck switches while you're away from your boat. We got a lot of help from Mike and Vince at our local Englund Marine store with the details of the installation. Englund's also loaned us the big $600 pair of crimpers to attach the lugs to the monster wire.

The installation looked perfect. With excitement and trepidation Virginia stepped on one deck switch: nothing. Then the other deck switch: also nothing. The deck switches feed into a control box that contains two solenoids, one for the up and one for down. Using a chunk of battery cable and bypassing the control box we determine that the winch and the switches were working fine. The control box was defective.

The new control box in a high locker just outside the chain locker. We made no connections inside the chain locker where they could get wet. The control box is a replacement. The original was defective from the factory.
I wish I could tell you that Imtra, the company that imports Lofrans windlasses to the US from Italy, was super accommodating when we called. Alas, it took my sweet wife lots of convincing to get them to agree to send us a new control box and pay for shipping. (She wisely wouldn't let her hot-head husband negotiate with the Imtra rep.)

The new control box from Imtra arrived a week later. It took a few minutes to switch it out and the windlass worked like a champ. It's frustrating to spend so much money on equipment, spend a lot of time and more money on installation and then have a high percentage of the pricey gear not work the first time.
Me demonstrating poor lifting technique. You can see some of the cable ties marking the chain lengths.
With the windlass installed, it was time to load the chain and anchor aboard. I waited until high tide before bringing the chain down the ramp to our dock in a wheelbarrow. We laid the chain out on the dock so we could measure and mark it.

Goodlander marks his chain every 50 feet with nylon cable ties, as many as will fit on one link. That's about five or six in our case. At 50 feet we bristled up one link, at a hundred we did two links separated by three links, at 150 we three links separated by three links, and so on. Goodlander said marking the chain every 50 feet is a compromise between knowing too much and knowing too little. That made sense to me.

Virginia had the idea to spray paint a mark in between, so we can get a little finer detail on how much chain is out. We used some white appliance paint to mark three links every 25 feet, if it wasn't already marked with the cable ties. The advantage of the cable ties is that even if your chain is real muddy, you can still see them. The painted links in between might be obscured with mud, but most of the time we should see the mark.

Considering how close the tolerance is between the chain and the gypsy head on the windlass, it's surprising that all the cable ties don't gum up the works. But I could detect no change as the bristly links came aboard. According to Goodlander, the cable ties last a long time too.
The new U bolt installed in the chain locker along with some Dry Deck to allow the chain to stay drier.
Before we loaded the chain aboard, we installed a heavy U bolt in a re-enforced section of the chain locker's bulkhead. This is to tie a length of rope onto the end of the chain, well, nearly the end. Goodlander suggests tying the rope five links from the end so you can shackle on more chain or rope to increase the length of your rode, should you need to. The rope tied to the U bolt can take the strain temporarily while I shackle additional rode onto the end of my 300 feet of chain.

The chain is not shackled to the U bolt for another reason: in an emergency I may need to divorce the chain from my boat. With a length of rope, just long enough to clear the chain gypsy, I can cut it free if I need to and retrieve it later.

I also put four squares of Dry Deck in the chain locker to keep the chain off the bottom and allow some air to circulate to keep the chain drier. This was another suggestion from Goodlander's book.
I will need to add a stainless steel kick plate to the bow of Oceanus to protect it from the anchor.
We used the windlass to load the chain on the boat. A few feet before the anchor came aboard we added a link's worth of cable ties to warn the windlass operator to slow down and ease the anchor aboard.

Oceanus has a deep chain locker. The chain drops about six feet before it starts to pile up. This is good to keep the chain from hockling. Shallow chain lockers, so common on newer boats, have a problem with this. I don't anticipate we will.
Oceanus's deep chain locker.
I really enjoyed reading Creative Anchoring and I learned a lot. Great stories, good and bad examples and loads of Goodlander's opinions informed by more than half a century of living afloat. The details in the book was just what I needed to finally put together my anchoring system.


Thursday, October 1, 2015

Changing throttle and shift cables

Henry works on the binnacle of Oceanus to replace the shift cables.
Among all the projects aboard Oceanus, changing the shift and throttle cables was not even on my radar.

I've been reading sailing magazines since I was a kid and I can't remember a single article about changing them. Like most things on a boat, you only replace them if it's a problem, right? But Henry, my diesel mechanic and friend, insists they should be changed every seven years. More often if you don't use your boat much.

The thing about shift and throttle cables is the problems creep up slowly. The cables, which run from the helm to the transmission and fuel-injector pump on the diesel, gradually get stiffer and harder to move until they freeze up all together or break; possibly -- no probably -- at a critical moment. A broken or frozen cable would leave you unable to shift or control your throttle.

Henry was suspicious of  my cables from the get go. "When was the last time these were changed?" he asked, pinning me with his piercing blue eyes. Without waiting for an answer he said, "I bet it's been more than 20 years." My guess was that it was even longer than that, but I didn't say anything, I just shrugged.

Henry's diagnosis was confirmed when he drove the boat. "These are way too stiff," he said. "And the chain for your wheel needs oiling too."

I hoped this would be a simple job. Just take the old cables out and put the new ones in. What could go wrong?

Everything. OK, that's a bit of an exaggeration. All six of the bolts we needed to remove to take apart Oceanus's helm were frozen. Henry managed to remove three of them without breaking them off, but it was an hours-long struggle. The remaining three finally broke off and had to be drilled out.

An hour and a half job became a day and a half job. All because who ever put the six bolts in last never coated them with anything to prevent them from freezing in place. That person was not Henry, who coats every bolt he puts in a boat with Never Seize.

"Years from now when someone takes these apart they will thank me," he said. And be amazed something actually comes apart easily, I thought.

To get at things better, we removed the stainless steel tubing that supports the helm and took off the old teak piece that connected the two. The teak was already the worst-looking piece of wood on the boat and taking it off didn't help its looks any; a big chip broke lose as we were removing the U-shaped stainless tubing that serves as a handhold.
The old wood piece that helps tie everything together at the helm station was the worst-look piece of teak on the boat.
After Henry left that evening of the first day of screw removal, Virginia polished the stainless steel handhold and I went to my stash of teak pieces and found one to make a replacement for the connector piece. Using the old one as a pattern, it only took me a couple of hours with a jig saw, drill, hand plane and sander to make a replacement. When Henry returned the next morning he approved.

Henry spent the better part of the second day removing the old screws from the binnacle. He then ran a tap through all the holes to clean up the threads. Finally, he could replace the cables.

He helped me attach our teak cockpit table to the new teak replacement piece I made. Then we put the binnacle back together.

Before he left to head back to his home and business in Salem, he offered to take the throttle and shift levers home to spruce them up. They are original to the boat. Forty-five years of use, abuse, saltwater and neglect took a toll on the nickle plating; it was about half gone and both levers were corroded. Henry said he would glass bead the levers and polish up the bronze on his buffer. He also assigned me a list of tasks to complete before he returned, including oiling the chain and other moving parts of the steering system.

The next weekend Henry returned with the levers. Not only were they now beautifully polished bronze with all the nickle plating removed, but he painted the background on the cast lettering that says "Fuel" on one and "Shift" on the other. A very nice touch.Thanks Henry!
The polished bronze looks nice with the new teak.
The new cables make a huge difference in the feel and response when driving Oceanus. Best of all, I don't worry about them failing, at least for another seven years or so.

Wednesday, September 16, 2015

From The Pit of Despair to the Valley of Hope

Henry in his natural element.
For months I've been making almost daily forays into The Pit of Despair, a.k.a. the engine room on Oceanus.

Just before we bought Oceanus three years ago Jason, the previous owner, pulled the Perkins 4-108 and rebuilt it. He fired up the engine before we purchased the boat and it ran great. The fuel lines from the engine were stuffed into a five-gallon jug of diesel fuel and there were a few more things that needed finishing up, but the big job was done. Finishing up the rest of the install would be, well, maybe not easy, but something I could do. Or so I thought.

Actually I didn't think about it much. For the first two years we owned the boat my wife and I focused on the fun stuff; finishing the interior of the boat and painting the outside. These were things we knew how to do.

But I had the nagging sensation that I should get things done in the engine room. Here's a partial list of what needed doing: replace prop with correct one, replace raw water pump (the old one leaked around the shaft), rebuild spare fuel-injection pump and replace the one on the engine (it had a fuel leak around the throttle shaft), make new instrument panel, install new fuel tanks, run new fuel lines, install new fuel-tank vents and run vent lines, install secondary fuel filter, replace/upgrade alternator, mount oil filter and raw-water strainer... the list went on.

Before our haul out last year, Jason helped replace the raw-water pump and, with the help of Lance the diver and Jason again, we replaced the prop. That was enough to get the boat safely up the Yaquina River 11 miles to the boatyard and back, but it still left a lot that needed doing.

I thought Jason would be around to coach me on work in the engine room, but (good for him -- sad for me) he moved to Hawaii last fall.

Last winter and spring (we only have two days of summer on the Oregon Coast, which I took off) I worked at finishing up the interior, installing plumbing (another hated job) and cutting down the engine room to-do list. With the latter I got good advice from Henry, a marine engine mechanic from Salem who spends every weekend working on his 50-foot 1950 Stevens motor yacht. He would drop into the engine room and tell me what I was doing wrong and I would change it. (I moved my secondary fuel filter three times.)

Each day I climbed down the hatch my discouragement grew until I began calling the engine room The Pit of Despair. With time running short and faced with some daunting tasks, like changing out the fuel-injection pump, I cried uncle. I was in over my head and I knew it. It took some persuading, including my wife talking to Henry's wife, Kelly, but we finally got a commitment from Henry to help me.

Over the last couple of weekends, he finished most of my list and found several other problems that needed fixing. One was rebuilding the starter, which he took back to his shop and brought back the next weekend. The difference was nothing short of amazing.

Between weekend visits Henry would give me assignments as he found more things that needed doing.
Henry measures for new cables.
Henry spent one long day changing the fuel-injection pump. The old fuel-injection pump leaked fuel from the throttle shaft. It took Henry until late evening to install the newly-rebuilt pump, but we couldn't get the engine started. The hour was late and Henry needed to leave to go to his home and business in Salem the next morning. "Don't worry," Henry said, "the engine kicks over the first time on only about 20 percent of fuel injection pump installs."
I made the new instrument panel, but Henry finished wiring it.
But worry I did. I would wake in the middle of the night worrying. When Saturday came I hoped Henry would have time to work on my engine, but he had another job that needed doing. Saturday evening he came by the boat and dropped off some tools and a battery switch and said he would work on the engine Sunday morning while we were at church. During church I found myself wondering and worrying about how Henry was doing. I'm not used to turning over boat projects to other people.

As we walked back down the dock from church I could see water happily spurting out of the engine exhaust. The engine was running great! All was right with the world.

Henry also installed a battery switch and cables so we can use our house bank to start our engine if our starter bank fails. We can also charge our house bank using our new alternator.

"Now tomorrow I'm going with you when you motor over to the fuel dock to fill your starboard tank," Henry said. "I want to check to make sure there are no leaking fittings."

Henry in his ever-present, faded orange knit cap aboard Oceanus.
It was great to have Oceanus leave the dock again. Henry and I noticed that idle was a little fast, but the engine ran great! The fill up went well with no leaks.

Back in our slip Henry adjusted the throttle and discovered another problem. The throttle and shift cables needed replacing. So next weekend Henry will be back getting Oceanus one more step closer to leaving.

Monday, August 17, 2015

A visit from "Flying Sideways"

Karin and Joe's Flying Sideways looking good at Marina Chiapas, Mexico.
Karin and Joe from Flying Sideways, a Columbia 43 Mark III, visited the Oceanus crew on Saturday. The four of us had a wonderful time as they inspected our boat and we peppered them with questions about cruising in Mexico and farther south.

I've written about Flying Sideways before. She is one of the prettiest 43s around. Over the last three years, Karin, Joe and their dog Jack have sailed her from San Diego to Mexico and Central America. The crews of Oceanus and Flying Sideways followed each other's adventures for the last couple of years on each others' blogs. When we finally met in person they felt like old friends. Let's hear it for the wonders of the internet!
Joe and Karin hard at work.
Karin and Joe are no strangers to adventure. They are both pilots and skydivers each with thousands of jumps to their credit. For the past three years they cruised Flying Sideways in the winter months and then work for the largest skydiving company in the world during the summer in Phoenix, Ariz.

When they won a trip to Portland, Ore., they rented a car and came to Newport to see us. The conversation was non-stop as they inspected our yacht and we quizzed them about their boat and adventures.

They bought Flying Sideways in San Diego and worked on outfitting her for five months before heading south to Mexico. Their first foreign port was Ensenada, which they gave high marks for easy entry into the country with friendly officials and good services. The first season they explored Baja and the Sea of Cortez. Their second season they explored Mexico's Gold Coast all the way to the southern border.

This last season started with the notion of sailing to Panama and Chile, but the ever-flexible crew of Flying Sideways ended up cruising Nicaragua, El Salvador making it as far south as Bahia Ballena in Costa Rica where "everything started to break: water maker boost pump, dingy engine and solar charge controller." They returned to Marina Chiapas in Mexico to lay up their yacht for the summer.

We enjoyed hearing highlights over Virginia's excellent pot roast. Stories like the time the dropped anchor off Zihautenejo and found they were about 100 yards from the main stage during a week-long international guitar festival.


Joe and Karen love the ocean and the desert.
Their love for the people and places they visited is infectious. Their advice and recommendations: pure gold for us. We can't wait to follow in their wake. We look forward to seeing them again. The sooner the better. From virtual friends to real friends. Karin and Joe, we miss you already.


Tuesday, August 11, 2015

We need your vote!

Sailrite, a company that we've spent a lot of money with during the boat's restoration, is having a contest and we need your vote.

We entered our cushions and pillows in our main cabin. Here's the photo:

Just go here, find our photo and vote for us. We are currently in third place without any effort on our part, other than entering. The two projects in first and second place are POWER BOATS! We can't let them win!

Friday, July 24, 2015

Eight reasons we didn't go north

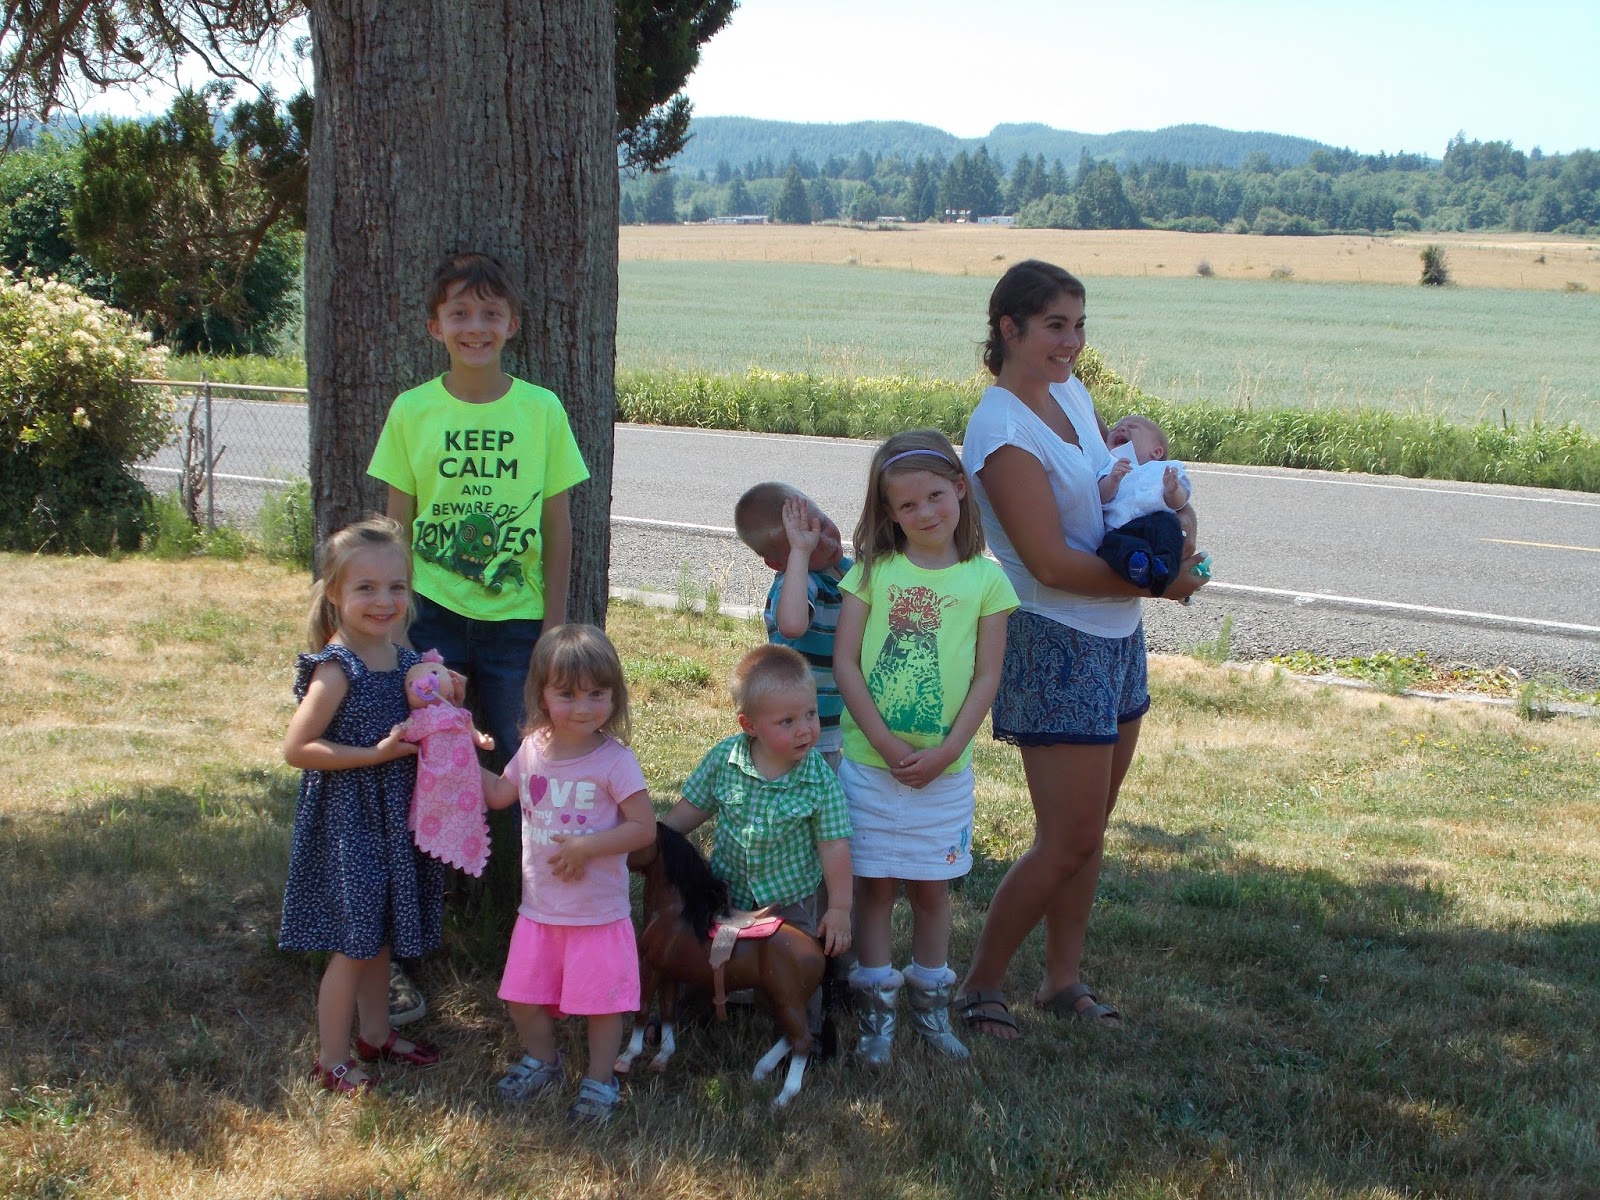
Eight cute reasons gathered together during the July 4th weekend.
This spring, being our optimistic selves, we thought we could have the boat seaworthy by summer to spend a month or so in Puget Sound close to our kids and grandkids. That didn't happen.

During the July 4th holiday we managed to get all eight grandchildren in one place for a photo. As you can see they are a cute bunch and a real magnet for us. In a way I'm glad we didn't go north first. I'm afraid it would be too hard to leave.

The third anniversary of us becoming the stewards of Oceanus came and went last week. Our to-do lists are still long, but not seemingly endless like at the beginning of this journey. There are many improvement I have yet to report on the blog. I want to take new photos of the boat and have a before-and-after photo set similar to the conclusion of one of those TV makeover shows.

Stay tuned.

Tuesday, June 9, 2015

Stripper pole safety with true-lover mats

Sailor's true lover mat weave provides secure footing on Oceanus's companionway steps.
The vast majority of injuries (more than 70 percent) aboard a sailboat are the result of falls. Most falls occur while going in or out of the companionway. *

This statistic became real for my friend Kevin, who owns Skylark, a beautiful Columbia 50 he moores on San Diego Bay. Last year his wife fell coming down the companionway ladder when they were anchored at Catalina Island. Her feet were wet from kayaking and she slipped on one of the three wide steps going down into the cabin and broke a rib.
Kevin's beautiful Columbia 50, Skylark, getting ready for a sail on San Diego Bay.

The accident cut the trip short and they made a speed run back to San Diego and the emergency room.

"It's easy to forget just how incredibly slippery things can get when they get wet," Kevin said, "Things getting wet on a boat is an everyday deal. Plus, I'm only getting older and don't heal as fast anymore."

Kevin's quick solution was to install self-adhesive rubber safety treads from Harbor Freight (http://www.harborfreight.com/self-adhesive-rubber-safety-step-tread-98856.html). It seems to be working.

"Elegant?  No.  Functional?  Yes," he said.

Skylark is so elegant that I didn't notice the rubber treads when I was aboard. I was about to follow Kevin's lead and make a trip to Harbor Freight for treads to cover our varnished steps, but my wife had another idea. She suggested that I make rope mats for the steps similar to the ones I made for our previous sailboat, Lobo, a Pearson Renegade.

The pattern for the rope mat is called the sailor's true lover mat weave. I saw it in my old copy of Hervey Garrett Smith's book, The Marlinspike Sailor. Even in Smith's day (before the advent of fiberglass boats and synthetic ropes) sailboat owners used rubber matting on ladder steps. He grants its efficiency, but says: "Neat rope mats, however, are not only just as efficient, but softer under foot, far more interesting, and bespeak a real welcome to the cabin below."

I got out my old copy of the book. I looked at the picture, but try as I might I could not get the knot started. Why I could weave a rope mat 30 years ago, but not now is... well... let's think about something more pleasant, shall we?

Rosella to the rescue

Our friend, Rosella from a few boats down, weaves rope mats. I know this because examples of her work are all over her boat. She's from Western Samoa and started weaving mats and other things when she was a child.

Rosella and Virginia weave rope mats for Oceanus' companionway steps.
She agreed to come to our boat and show us how it's done. She wove the first mat while Virginia knitted and watched. It took a few months to schedule another weaving session. When Rosella returned, she and Virginia wove the last two mats together. Rosella set up the pattern for both mats and then together they wove in the rest of the rope. This kind of activity encourages a lot of visiting and stories. It's the kind of activity that weaves communities together.

After Rosella left, Virginia and I tightened up the mats so they fit the steps. The edges of the mats come right to the edge of each step.
Rosella and Virginia talk story while weaving rope mats.

Once they were the size and shape we wanted I glued them down with white adhesive caulk. Each mat took an entire tube. It's a time consuming task too. You must make sure all the rope is glued down, especially around the edges. It takes time to mold and press the mats into the right shape and clean up the extra caulk that squeezes out as a result.

I installed the top mat three or four months ago. We are pleased with how well it's held up. It looks better with age. The 5/16ths nylon rope used to make the mats is tough and abrasion resistant. Best of all, it provides great traction and feels good when you step on it with bare feet.

Keeping them clean is less of a challenge than I anticipated. A quick vacuum usually does the trick. The steps are removable, so when they get really dirty I can take the steps on deck and give them a good scrub. If they really get ugly we could always paint them. I would hate to do that, however because we would lose some of the cushy feel.

Stripper pole love

The other part of safety around the companionway is having convenient and strong places to grab. A few months ago I installed a brass stripper pole near the companionway. Several visitors to the boat looked at me over their glasses when I point out this safety feature. "Every well-found yacht should have a stripper pole, right?" I said sheepishly.
A view of the weavers from the companionway shows the brass stripper pole.

Since everything aboard needs to serve at least two functions, I used the stripper pole as a leg to our new salon table. I lashed on an L-bracket on with net twine using a French hitch. Now, blessedly, it looks less like a stripper pole.

Two teak grab rails on either side of the companionway complete the safety upgrades.

Making Oceanus safe is a major goal during her refit. Projects to improve safely, like getting in and out of the cabin without falling, are a priority. I can't eliminate all possibilities of falls, but these are some obvious ways to mitigate the risk.

* For you ex-copy editors and researchers out there: I can't remember where I read this, but it stuck in my head. Anyone?