Monday, October 7, 2013

Chainplates, mast boots: making Oceanus water tight

My tarted-up hanging knee with polished and re-installed chainplate.
A couple of weeks ago I pulled the chainplates on Oceanus intending to replace them. I didn't know how old they were and, since they were stainless steel, I worried about crevice corrosion where they went through the deck.

After I cleaned them up, they looked to be in good shape. I polished them and showed them to a boat builder friend and then to a sailboat owner in the marina who owns a metal fabrication business. Both of them declared them to be in good shape and recommended reusing them. "They will last as long as you want to sail the boat," the metal shop owner said. That was good enough for me.

Before I re-installed them, I painted the hanging knees they bolt to and made some other enhancements.
I epoxied on three fragments of a study cast
 by Nora Hall.

In the original interior arrangement, the knees and chain plates were inside some cabinetry and consequently were pretty rough looking. Now the port hanging knee is out in full view above our bunk. I cut away some unnecessary sections of the hanging knee making it look a little more graceful and so it would not interfere with the bunk's occupants. I also thought it would be nice to make it thicker and rounder so it wouldn't hurt so bad when we smacked into it.

To that end, I epoxied a study cast I had from my carving teacher, the late Nora Hall. The cast had already broken in one place and I cut it in another to make it fit the curve better. I filled between the breaks with thickened epoxy. Once it was painted, I liked the way it looked. It provided some visual interest as well as softening the sharp edges for safety. It also reminds me of a great teacher and beloved friend.

All I did on the starboard chainplate was clean and paint it, since it will be inside another cabinet.

While the chainplates were out, I filled the holes where they went through the deck with epoxy to seal the deck core around them. I then cut away most of the epoxy so I could replace the chainplates, but the wood remained sealed and any voids in that area of the deck filled.
The blocks on the knee and the bulkhead
 are for shelves to be added later.

I used bytal tape to seal the chainplates where they came through the deck.

Oceanus leaked (notice the hopeful use of past tense here) where the mast came through the deck. I needed to seal her up before the rains start again. I considered several fixes to this age-old problem, including one system that cost more than $100.

Just in the nick of time, a sailing blog that I read, The Commuter Cruiser, had an article on using a wax toilet seal to waterproof around the mast. Having replaced a few toilets in my time, I thought, This. Could. Work!  (Cue the Young Frankenstein music here.) The wax seal cost about $2 -- way better than my other options.

I ran the wax seal treatment past several of my sailboating buddies. They all thought it should work, but expressed concern that it would melt in hot climates, like the Sea of Cortez, where I hope to be about this time next year. Jan and David of S.V. Winterlude haven't had any problem for the five years the toilet wax seal has kept their boat dry and they cruise in the western Caribbean, where I hear it also gets pretty hot.

One old salt, who sailed to most of the places I want to visit, said he keeps a couple of toilet wax seals in his kit to seal leaks in an emergency. "You just wad it up into a big ball and shove it in the hole," he said. Not a bad idea.
The tools, the old caulking and the blood. When I'm through rebuilding her, Oceanus will have enough of my blood to be a relation.
The worst part of the job was digging out the old caulking around the mast. It was really tough stuff. I think it was some kind of polysulfide caulk. I tried a couple of things to dig it out, but a sharp eighth-inch chisel seemed about the only thing that worked.

I used a flat screwdriver and a half-inch chisel to pull it away from the sides of the mast and the metal ring around the mast. Then I used my Thor hammer to drive the eighth-inch chisel in and pry it out. It was so hard and rubbery that when I got a little bit free I would grab it with my right hand and pull on it while working the chisel under it. I was breaking my cardinal rule about working with knives, chisels and other sharp tools: always keep all body parts behind the sharp edge -- but it was the only thing that was working.

After a short break to get a band aid and stop the bleeding, I carried on until I had the old caulking removed to about an inch deep. I suspect there is at least another inch or more lurking down there, but I think I removed enough to allow the wax to do its job.

The hole for a compression rod.
It was kind of fun to use a putty knife and fill in the void. I made a nice little slope so the water would run off. Then I used some Emergency Tape to cover it so it wouldn't get dirty and also to protect the crew from the sticky goo.

I also used the wax to fill a hole in the casting where the compression rod will go when I reinstall it. The old caulking I pulled out from the hole had signs of water intrusion. I think that was a major source of the leaks.

I also cleaned out old caulking from the screw heads that hold the aluminium casting in place and used Liquid Boatlife Caulk to seal them. I used the same stuff around the edge of the casting, but I think it was a little too thin. I may have to redo that part of the job.
Bol-Wax; don't fail me.
I'll let you know how it works. I have a feeling I won't have to wait long before it gets a good test.

Friday, September 27, 2013

Making our Columbia 43 comfortable

A big step away from the onboard camping lifestyle: our new refrigerator.
"Would you like a cold beverage from the refrigerator?" I asked for about the tenth time in two hours. For the tenth time I got a smile and giggle from Virginia. Yes, Oceanus has a refrigerator. Finally.

It's one of the things we did this weekend to make our Columbia 43 a more comfortable home. We stay on the boat one or two nights a week now. So far it's been a little like camping, but gradually the livability is improving. In addition to getting and installing an Isotherm 4.6 cubic foot refrigerator we made improvements to our double bunk that made it irresistibly comfortable. I think I slept better last night than I have in months.

First the refrigerator: When we bought Oceanus a little over a year ago she didn't have any kind of an icebox and the galley was just roughed in. That gave us the freedom to design it to our liking. Too much freedom is a dangerous thing.

I originally planned on building a super well-insulated icebox with a stainless steel interior and add a refrigeration unit. Virginia wanted to put the sink where I wanted to put the icebox so it made us rethink my idea. Then I talked to a friend at the marina who had built several boats, including a 47-foot Perry-designed sailboat. In that boat he spent about $10,000 -- according to him -- on a large refrigerator with a large freezer, with an engine-driven compressor in addition to a separate compressor that ran off the battery bank.

"If I had to do it all over again I would just get one of these," he said, opening his small Isotherm refrigerator in his current boat. "It uses less energy than that 20-watt light and it was about a tenth of what I spent on my other boat."

I was already overwhelmed with the number of projects on Oceanus. This looked like a good way to save time and money, since it would cost less than the refrigeration unit alone, not counting making the box for it. We finally ordered the Isotherm last week.

The day I took it to the boat was the only day this week that was sunny and dry. I should have been working on our list of high-priority projects on deck. Instead I installed the refrigerator under the counter top in the galley. It was worth it just to hear Virginia giggle later when I handed her a cold beverage.

Virginia makes up our super-comfy bunk.

Our bunk a year ago.
The other big leap forward in livability was the improvements to our bunk. Originally we planned to cut down our queen-sized foam mattress we sleep on at home. It's super comfortable, but heavy and about 10-inches thick. It would have been a bear to wrestle into place and once it was in the bunk it would have severely restricted our ability to access the large lockers under our bunk. If it ever got soaked -- something that occasionally happens on cruising sailboats -- it would be tough to get dry again.

At first we started with 5-inch medium-density foam, hoping it would suffice. It did not. We both woke up sore. It was in two pieces and it's pretty light making it easy to move, but we needed more comfort. This week we added a single piece of 3-inch thick memory foam on top and an Ikea waterproof mattress pad. For sheets we used our microfiber fleece sheets that feel warm even when they are not and wick moisture away from your body. The results were as close to perfect as you get in this life. And all the parts and pieces can be hauled up on deck to dry out should they get wet.

I was hoping the waterproof mattress pad would prevent the condensation that occurs when the warm, moist air from our bodies hits the cool plywood of our bunk. When I checked under the foam in the morning I could feel some moisture. I don't know if there is a better solution than airing out the mattress each morning, but I'll keep looking. I'm hoping when we are in a warmer climate condensation won't be the problem it is here in the cold, wet Northwest.

This livability advance from an unlikely source. For years Virginia knitted the dish cloths we used at home. They worked great, but had a fatal flaw: after a day or two they really stunk. This wasn't too much of a problem with a washing machine just a few steps from the kitchen, but the boat is a different matter. A fellow blogger touted the benefits of Scrubr, a non-absorbent dish scrubber. We tried a pair. They didn't stink and did a great job scrubbing dishes, but they weren't good for much else. Don't even try to wipe the counter top with them. Spill something? Forgetaboutit!

Our Dollar Store find. Two for a buck is hard to beat.
While in the Dollar Store we saw some Microfiber Stripe Scrubbers that looked interesting. It had microfiber on one side and a nylon mesh on the other. A two pack cost a buck, so we bought one. After using one for a week it didn't stink and we were delighted with how well it worked, not only on washing the dishes, but wiping up the counter top as well. We went back and bought several more. We found them at two different Dollar Stores, so they might be fairly widely available. They look like they will hold up well and, as if it can't get any better, they come in a color that matches the colors on the boat.

Sunday, September 15, 2013

Project updates: Painting, hunting and gathering

Making a maple cutting board for Oceanus - total joy; finding a machine screw - total PITA!
Virginia and I spent Saturday painting the deck house and the water channels on Oceanus and she is looking good! We are using white Interlux Brightside polyurethane paint on the glossy parts of the deck and topsides. That will be followed up by an industrial non-skid paint for the parts you walk on.

Head painter Virginia spent hours on her hands and knees for the last few weekends sanding and stripping old paint off the decks. I've also put in my time filling, fairing and sanding. The part of the project that had us concerned was getting the old paint out of the molded-in pattern on the non-skid parts of the deck. The original baby-blue non-skid was painted at least twice (grey and then white) by previous owners. The paint filled in the pattern in the non-skid rendering it non non skid.

The deck in the bottom of the photo is stripped and ready for painting.
We finally hit upon using an environmentally-friendly stripper and a stiff wire brush to get the old paint out of the non-skid pattern. It worked like a charm, with work being the key word. Virginia contributed the most elbow grease while I was doing other projects. She worked steadily last weekend while I was teaching a Family Crabbing Workshop for the Oregon Department of Fish and Wildlife.

The payoff was this weekend as we finished painting the deckhouse and water channels on the deck. It looks great! (I forgot my camera. Sorry. I'll snap some photos later.) We thought doing the glossy parts first would be easiest when it came time to tape them off before we applied the non-skid, which must be done with a roller.

We also spent some time last weekend fitting the beautiful new dodger Virginia has been working on for months. The cabin top needed to be painted before we attached the fasteners for it. (Virginia is working on a post, or a series of posts, on making the dodger.)
A fitting session for the new dodger. Notice the color of the dodger and the bulwarks. That is no accident. 
I'm also reattaching some of Oceanus' deck hardware, specifically her sheet winches and cleats. Most of the bolts were in the boxes that came with the boat, but I did have to hunt up some new ones that were MIA. The one that gave me the most trouble was the 5-inch, 5/7ths, slot-headed machine screw for one of the cleats. I finally found one in Portland, two hours away. It did give us a chance to hunt and gather some more items we needed for the boat, but it felt like an unnecessary trip.

This brings up something that I've complained of before when I was building Ravn, my 19-foot faering. It seems like much of my time building (or rebuilding) boats is spent hunting, gathering and making the many specialized parts required for the projects. These can be pretty esoteric and hard to find.

Sometimes it's easy and fun. Like making a maple cutting board to fit over the stove top. The wood for the cutting board was kicking around my shop for longer than a decade just waiting for a project. I knew exactly where it was and it was just the right size. Cutting to rough size, jointing the edges and glue up took about an hour, even counting mixing up a small batch of epoxy. The next day I sanded, cut to final size, bull-nosed the edges, gave it a final sand and ragged on some cutting-board oil -- maybe two hours. That's a total of three fun hours on something I know we will enjoy looking at and using nearly every day for years. (I never tire of the beautiful figure in tiger-stripped maple.)

Finding the machine screw for the cleat took days. First checking with all the local sources, then scouring the internet and catalogs until I found one. Topped off by a four-hour round-trip to Portland, and shelling out nearly 20 bucks, because you can't just buy one. All for a little, but critical, part that we hardly notice.

This frustrating, time-consuming, expensive crap is why projects on a boat are twice as expensive and take three times as long as you think they will.

Monday, September 9, 2013

Great new web site for Columbia 50s

Columbia 50
Kevin Reilly, owner of the  Columbia 50 Skylark, built a wonderful new web site about that beautiful Tripp design. I heard about it through the Columbia Sailing Yachts discussion group, of which we are both members. (Also a great resource for Columbia Yacht owners.)

Of all the Columbia sailboats I think the Columbia 50 is the most similar to the Columbia 43. They both have the same designer, the dimensions are suspiciously similar (the beam is the same on both, the waterline length is only one foot shorter on the 43 than the 50, the draft is nearly the same and the standard interior layout is nearly the same).

The boats were so similar, in fact, that Columbia Yachts could use the entire deck, including the house and the cockpit, from a C-50 on the C-43 hull number one . They just had to trim around the edges.
Columbia 50

Columbia 43

Here's wishing Kevin well on his new endeavor. Be sure and check it out.

Thursday, August 29, 2013

New Lewmar hatches for Oceanus

The new hatch in the head provides light, ventilation and 2.25 square feet of 6'4" headroom.
This week of rainy weather put pressure on Virginia and I to get things done before the real rain starts in a few weeks. On the top of the list for the semi-dry weather that passes for summer on the Oregon coast, was to finish the installation of two new Lewmar opening hatches. I've been working on this project for more than two months and finally drove the last screws last night.

With the change in the boat's layout, the additional hatches are essential to provide light and air to the stateroom and the head. After cutting the two holes in the deck for the hatches I went below and was amazed at the difference it made. In the head, an additional bonus was a precious 2.25 square feet of standing headroom for my 6-foot-4-inch body. But I'm getting ahead of myself.

Before I could cut the holes, I had to make combings for the hatches to raise them above deck level and accommodate the generous crown in the Columbia 43's deck. I decided to make the combings out of purpleheart --a dense, waterproof wood that will not rot. It also glues well with epoxy. I ripped a nice board into two-inch strips and cut them to length. I laminated the two square combings, intertwining them at the corners to create a kind of finger joint. The combing for the stateroom was about one-and-a-half inches high, the one for the head was more than two inches high.

Then the fun began. I had to cut and shape the glue-up to match the inside and outside shape of the hatches. I made a template out of thin plywood to the inside dimensions of the metal-framed hatches. Normally, this kind of work wouldn't be a problem, but purpleheart is an extremely difficult wood to work. It is ranked as one of the hardest and stiffest woods in the world -- think working hard stone. By the time I finished shaping the hatches my shop was covered in purple dust, there were several burnt and broken jigsaw blades and I was wounded.
Hatch combings about halfway through the sanding and fairing process.

Purpleheart produces the nastiest slivers of any wood I've ever worked, even worse that wange. I got one so deep while making the combings I had to go to the doctor to have it removed. When he finally dug it out it was more than an inch long. I almost fainted. It felt good to have it out after a week of trying to dig it out on my own. I took it home as a trophy to show Virginia.

I was losing sleep over cutting two, 19-inch square holes in Oceanus's deck. I called my friend, Michael (a.k.a. Doryman) for some backup. Since the hatches and the perfect-fitting purple-heart combings have rounded corners, we made the first cuts with a hole-saw matching the radius of the corners. Then it was a simple matter of connecting the dots with a Skillsaw. I knew it would be easy, I just didn't want to screw it up.

The balsa-wood core looked like new. I was again impressed at how beautifully-built the hull and deck of these old Columbias are.

Before we cut the holes in the deck, we used a grinder to rough-up the surface and prepare it for the glue and fiberglass cloth that would make the combings a permanent part of the deck. We used epoxy thickened with chopped fiberglass to a consistency thicker than peanut butter to glue and fair the combings to the deck. Two long screws going through each combing and into the deck temporarily held the combings in place while the epoxy kicked.
The combing in the stateroom is not as high because I didn't need any extra headroom.

During successive evenings, I removed the temporary screws, sanded, faired and epoxied layers of six-ounce fiberglass cloth inside and out. I filled and sanded the fiberglassed areas of the combings to make them one with the deck. Finally, I bedded and screwed the hatches into place.

Now all that is left to do is paint the outside of the combings to match the rest of the boat. We still need to paint the decks before the eight-month (or is it 10 months?) rainstorm that is winter on the Oregon coast. Stay tuned.


Friday, August 2, 2013

Sailmaker on Stumppy J has high praise for boat, skipper and crew

The Stumppy J heads for the finish line of the 2013 Transpac race from Los Angeles to Honolulu.
by Brandon

The tactician, sailmaker and navigator aboard the Stumppy J said the Columbia 43 Mark III "exceeded expectations" during the 2013 Transpac race from Los Angeles to Honolulu.

"Being an old CCA design, I was not sure how she would do in the big rolling swells of the open ocean, but she loved to surf under spinnaker," said Mike Price. "We would regularly come tearing down the faces of big 8- to 12-foot rollers and surge in to the 11 and 12 knot spectrum."

The 2013 Transpac, which is 2,225 nautical miles as the crow flies, had everything from a gale-force tempests, to cloudless blue skies with a warm following breeze, Price said. The first five days were very wet, often squalls and gales that would materialize, seemingly, out of nowhere. The first night had winds of 30 to 35 knots and the Stumppy J sailed under a double-reefed genoa and full mainsail on a close-reach. The boat hit 13.2 knots while blasting down a wave, Price said.

"No one on the crew got to take off their foul-weather gear until about the sixth day because it was so wet above deck," he said. "It was comparatively calm after the seventh day when we were firmly in the tropics and the rainfall was warm and pleasant. The wind would still pipe up into the 20s -- but it was a warm wind at our backs. I spent the last week in a jacket, no shirt underneath, and shorts all night during my midnight to 4 a.m. watch."
The Stumppy J at the start of the 2013 Transpac

The boats were in three doldrums during the race. "That was a bit of a pain," Price recalled, "but everyone else was in them too, so the fleet as a whole got to suffer a few days." At one point, the wind went totally dead on the race course and a few of the crew jumped in the ocean for a brief swim.

On the fourth day out the Stumppy J logged nearly 200 nautical miles in 24-hours.

"We had the Code 2A (asymmetrical spinnaker) up with a staysail inside of it and the mainsail at full hoist and were doing 9s and 10s on the GPS, surging regularly into the 11s and 12s," he said. "It was stormy weather, with winds ranging between 15 and 25 knots, making for a 24-hour adrenaline rush!"

You would think that would be the high-point of the race, but for Price, the best part of the race came during the last night at sea.

"We cooked a last supper and broke out the guitar and ukulele and the whole crew jammed and sang songs for two hours while blasting along between 8 and 10 knots under spinnaker," he said. "I wish that night never ended, there was such merriment and cheer on board... what began as a crew had become a family."
The crew of the Stumppy J upon arrival in Honolulu at the end of the 2013 Transpac. Skipper Ed Stumpp is the second from the right.
The Stumppy J, finished the 2013 Transpac race on July 22 with an elapsed time of 14 days, 11 hours, 33 minutes and 35 seconds. She finished sixth in Division 8, the same division as another, more-famous old timer, the 52-foot Sparkman & Stevens yawl Dorade. Built in 1930, Dorade won the Transpac in 1936 and took top honors this year as well.

Ed Stumpp, the owner and skipper of the Stumppy J, planned from the time he bought the boat to enter it in the Transpac, according to Price. The Log of Hagoth hopes to hear all the detailes from Stumpp himself.

Stumpp entered his boat in Southern California races as a warm-up for the Transpac and did well. Price was part of the crew for those races too.

"We made an impressive debut to the ocean racing PHRF SoCal scene with a 3rd-place finish in the 2013 Border Run Race (Newport Beach to San Diego)," Price said. "Then a come-from-behind first-place victory in the Catalina Island Series Race #4 (Isthmus Cove to Long Beach), beating the winner of the Newport to Ensenada race by 35 seconds."

Price praised Stumpp is a good leader and one able to make the crucial decisions on board. During the Transpac Stumpp "did an over-the-top good job in managing our various resources and crew mates," Price said.

Stumpp started to make improvements to his Columbia 43 Mark III soon after he bought it. He put in a new, tapered mast and new standing rigging on the boat. He rebuilt the main-sheet system, added a pad-eye to the foredeck for the tack a staysail, put in a solar panel bank, installed a watermaker, new keelbolts, new genoa sheets, new spinnaker sheets, new spinnaker halyards, and a new roller furler, among other things. Then, of course, he got the safety gear required by the TransPac race committee.
The Columbia 43 Mark III has a lead keel with less wetted surface than a regular 43's cast iron keel. It also has a skeg-hung rudder and six more feet of mast, which gives it a more powerful sail plan. Most Mark IIIs were built in 1973.

A good part of the budget was for new sails. Over the course of this year, Price, who manages the Hyde Sails loft in Los Angeles, built a new, custom mainsail for the boat, a 155 percent genoa, and Code 2A asymmetrical spinnaker. The 155 percent genoa was optimized to roller reef down to 145 percent, 135 percent and 125 percent without losing any shape.

"We went with good ol' Dacron with the sails." Price said. "The mainsail was made with bullet-proof 10-ounce Dacron, designed with two reefing points and five battens. The top two battens are full to support a massive roach profile along the leech of the sail. We made her as big and powerful as legally possible. The genoa was made out of 9 ounce storm-sail cloth and optimized to roller-reef without losing any shape. That proved to be a valuable and versatile design that allowed us to shift gears in the rapidly ranging wind conditions."

A Code 5A asymmetrical spinnaker was made of 1.5 ounce spinnaker cloth; the same weight as the other spinnaker on board. The other sails were a 105 percent storm jib made of heavy Mylar-Kevlar and a staysail.

"We used every sail except the storm jib and spent days four through seven under the code 2A until we blew it up," Price said. "We finished under the code 5A. Being the sailmaker on board, I had repaired the code 2A when we had put some tears in it during a botched spinnaker drop (that resulted with the spinnaker going in the water), but after a few days and a couple of bad round-ups, we managed to blow her up and she was no longer repairable with the tools we had on board. I'll be putting her back together in my loft after the boat returns from Hawaii."

The Columbia 43's staysail got a lot of use too.

"We used the staysail for ten days straight, only dropping her if we had to gybe or if the breeze dropped below 10 knots, which made it too difficult to refill the spinnaker if it were to collapse," Price said. "The staysail was good for about another quarter to half a knot, which on a 2,250-mile race is worth nearly half a day off of your total time."

Any problem areas other Columbia 43 owners should watch out for?

"The boat itself was, and always has been, fine," Price said. "Columbia 43's are so overbuilt that if a nuclear bomb ever goes off, there will only be roaches and Columbia 43's left in the rubble."

The crew did daily checks on everything from hull compression to keel-bolt tightness to rigging tension. Nothing ever needed adjustment or was cause for concern, Price said.

"We did put some serious wear on the rudder-post bearing, which was still fine when we arrived in Hawaii, but will need servicing," He said. "A lot of other competitors had similar wear and some broke their rudder-post bearings; there were some turbulent storms during the crossing."

Price said there were very few equipment failures aboard during the race.

"The first 36 hours were very stormy," he said. "Gales bringing wind as high as 40 knots with waves breaking over the entire boat. This allowed some moisture to trickle down a bulkhead into a socket, which caused a small electrical fire and claimed our 110-volt inverter."

The binnacle-mounted GPS stopped receiving satellite feed by the third day for no apparent reason. So the crew navigated the whole rest of the way with a hand-held GPS.

"My advice to others who will someday make the crossing is to spare no expense in your foul-weather gear and safety gear," Price said. "I wear Gill's top-of-the-line jacket and bibs over my layers of thermal clothing and waterproof racing boots so that I was both warm and dry the entire trip. I also have a personal EPIRB that I wore under my strobe- just in case the unthinkable were to happen."

Columbia 43s have a reputation as a great sea boat with a kindly motion. Price said he found that to be true, but, like every boat, the 43s have their strengths and weaknesses.

"The hull shape likes to keep the highly-powered sail plan on a broad reach at an angle travelling with the faces of waves," he said. "Any waves striking the vessel at an angle have a tendency to throw the stern one way or the other, which could either trigger a round-up or accidental gybe. The boat overcomes this by having such a balanced helm- it literally felt like power steering. In fact, corrective steering often needed an immediate counter-correction because it only took a small adjustment on helm to return her to proper course."

Sunday, July 28, 2013

New cushions a hit at Progress Party

Starboard-side settee with pillow. 
We had a great time Saturday at the Progress Party. It was just the shot in the arm we needed to keep up our enthusiasm for rebuilding Oceanus.

A big thank you to all of you who came and made the appropriate "oohs and aahs" over the work done so far. Many others emailed with regrets that they couldn't come and we appreciate that too.
Port-side settee with pillows.

Without question the stars of the show were the cushions my wife and her friend Joi made. Second billing had to be the work-of-art pillows Joi made. The cushions and the pillows made a guest appearance for a limited time only so I don't mess them up with sawdust, dirt, winch grease, paint, epoxy or you-name-it while I continue to work on the boat.
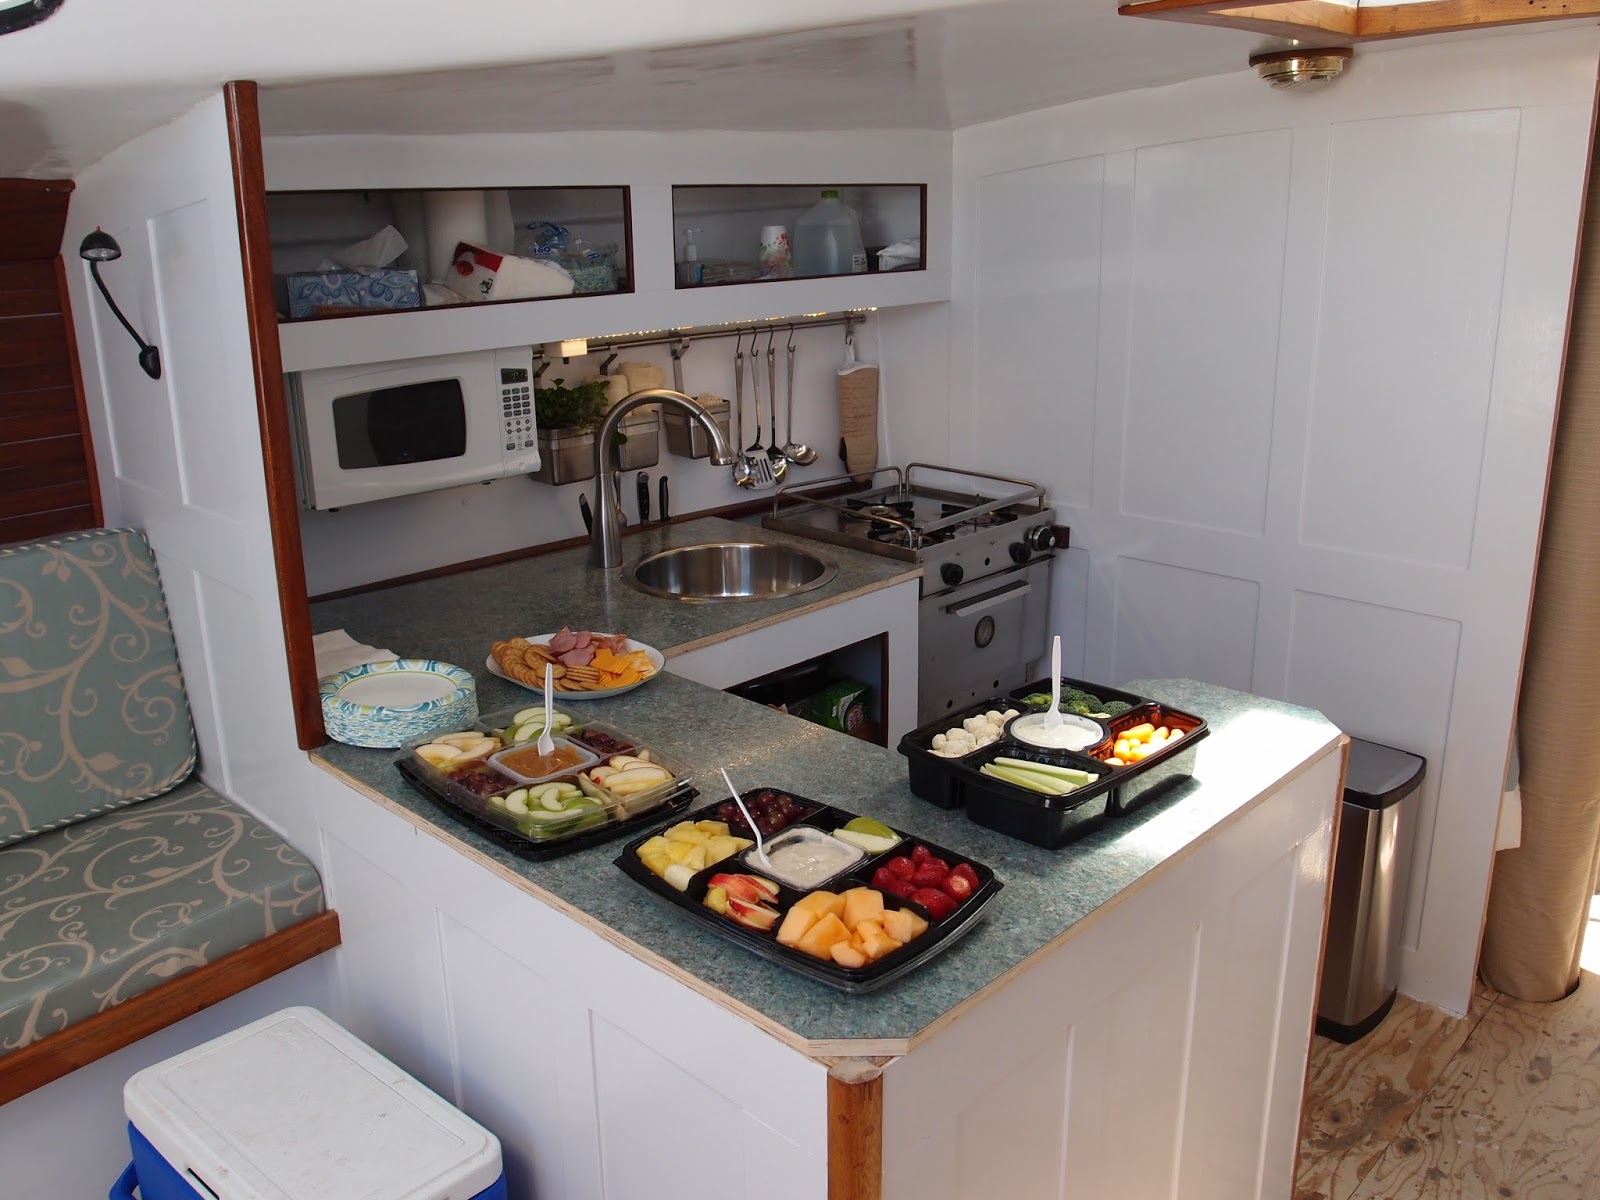
The sink and faucet in place with other galley items. Notice the LED strip light with dimmer switch.

The Columbia 43 proved she could be a great party boat along with her other long list of attributes. At one time we had nine people in the main saloon and six or seven people in the cockpit and it didn't feel at all crowded. In fact, we could have easily added a half dozen more and still had some elbow room. And that with no one on the capacious dance-floor of a foredeck.

Getting ready for the party was rewarding for us as well. In addition to seeing the cushions in place and sitting on them (they are super comfy), we got to play house by putting galley utensils in place and trying out baskets and other items we've purchased for the boat.
The double bunk in the master stateroom made up with the bed spread and pillows from BB&B.

We even made up the master stateroom bunk with a bedspread and pillows Virginia found at Bed Bath & Beyond. The color and the coral motif matched the colors in the boat and our love of coral reefs perfectly.
The knitting chair in place with good things to eat.

The whole experience reinforced how eager we are to finish the boat so we can move aboard and go sailing. Sometimes we would stand with our arms around each other and sigh, thinking about how nice it will be.
Those of you who couldn't make the party missed out on a lot of good food!
I wanted to take photos of the party but once people started arriving I got busy running my mouth and forgot all about it. I think my friend, Doryman, too a few photos. Maybe he will share one for the blog. I did take a video that I had to cut short when the first guest arrived. I uploaded it to YouTube here.